Sharpen Image Online
Bring a little more definition to your edges. Adjust the strength and compare.
Image workspace
No upload. No watermark.A new perspective starts here.
Drop your image, or paste it anywhere.
PNG, JPG, WebP & more · Up to 30 MBYour image stays on your device.
Ctrl + V to pasteSharpen image details in three steps
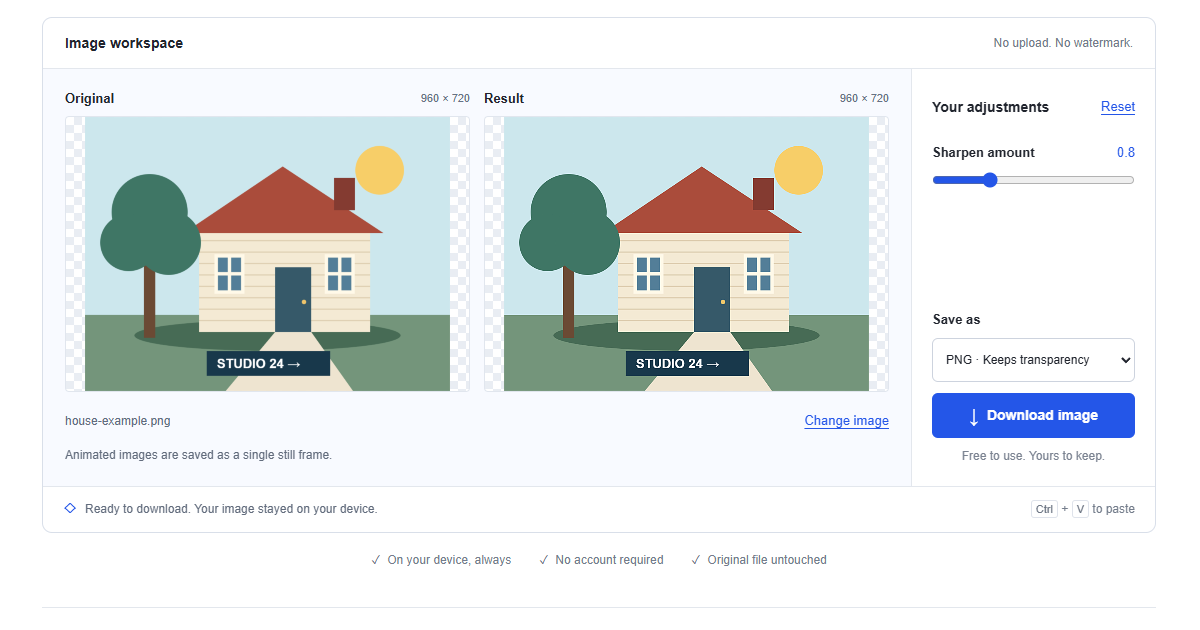
- Open a source image. Choose PNG, JPEG, WebP, GIF, AVIF or BMP from your device. You can also drag a file or paste image data with Ctrl+V on Windows or Command+V on Mac.
- Start with a modest amount. Adjust Sharpen amount between zero and three, comparing a fine edge and a smooth area. Stop increasing it when you see bright outlines, dark rims or stronger grain.
- Save and inspect. Choose PNG or JPEG and download after checking the displayed dimensions. Open the saved copy at its intended viewing size, since a small preview can hide oversharpening.
How sharpening changes neighboring pixels
The sharpener compares each interior pixel with its four immediate neighbors: above, below, left and right. It adds an amount-scaled difference between four times the center value and the sum of those neighbors. Uniform areas therefore stay unchanged, while boundaries gain contrast. This calculation runs separately on red, green and blue, leaving the alpha channel and outer border pixels unchanged.
Higher amounts create stronger differences and can clip channel values at black or white. The operation emphasizes existing detail rather than reconstructing missing information. Each adjustment starts from the original working image, so slider changes do not stack successive sharpening passes.
Five times a little sharpening can help
Improve a slightly soft photograph
A picture with recognizable detail but slightly weak edges may benefit from a modest amount of sharpening. Compare eyelashes, hair or a building edge while checking that smooth areas still look natural. This is useful for mild softness, not severe missed focus or a moving subject smeared across several pixels. If stronger settings only create outlines around the blur, return to a lower amount or choose another source.
Make scanned document text more distinct
A scan with soft but still readable letters can gain definition around its strokes. Inspect small type, punctuation and thin rules rather than only the bold heading. Too much sharpening may create dark specks or merge nearby marks, so compare the saved copy at normal reading size. This tool does not perform OCR, reconstruct missing letters or correct perspective; start with a clearer scan when those problems dominate.
Try light sharpening before an external resize
If a photograph will be reduced in another application, a restrained preliminary pass may help preserve the appearance of some edges through that workflow. Save PNG as the intermediate, resize elsewhere and judge the final size before accepting it. Sharpening after resizing is often easier to tune, and this page does not provide a resize control. Avoid combining strong sharpening both before and after the size change.
Emphasize product texture without false edges
Fabric weave, a metal rim or a small product label may look clearer with extra local contrast. Compare those details against the original and check that the material still looks believable. Excessive sharpening can make surfaces appear rougher or create bright borders that were never present. Keep the amount consistent with the photograph's intended use, especially where the image is meant to show the product's actual finish accurately.
Check a presentation image at its final size
A photograph that looks slightly soft after placement in a slide or document may benefit from a carefully judged final copy. First export or prepare it at the intended dimensions, then inspect the sharpened result in that same layout. A crisp preview at full size does not guarantee a better small thumbnail. Prefer the lower amount when both versions look similar, especially around thin lettering and high-contrast graphic edges.
Avoid halos: sharpening is not denoising
Strong edge contrast can create bright halos, dark rims, clipped highlights and rough-looking textures. Noise and JPEG artifacts are also local pixel differences, so sharpening can amplify them. Compare an edge against the sky and a smooth shadow area, then lower the amount if either starts to look gritty or outlined.
Denoising tries to suppress unwanted variation; sharpening boosts selected differences. They are not interchangeable, and this tool has no noise-reduction control. If noise is the main problem, reduce it in an appropriate editor first, then apply only the sharpening needed at the final output size. Neither step guarantees recovery of absent detail.
PNG or JPEG for a sharpened download?
Choose PNG for scans, lettering, transparent graphics and intermediate files that will be edited again. It preserves the processed pixels without lossy compression and retains the alpha channel. Sharpening does not remove an opaque background or make it transparent.
Choose JPEG for a photographic copy when transparency is unnecessary. Transparent areas become white, and compression can add ringing around already enhanced edges. Review the downloaded file before deciding the amount is correct. Neither export restores detail removed earlier, and the rendered copy does not retain the original camera EXIF metadata.
Supported formats and sharpening resolution
The browser can open PNG, JPEG, WebP, GIF, AVIF and BMP when decoding is supported. HEIC and SVG are not accepted; export PNG or JPEG first. TIFF scans also need conversion to a supported format. Animated inputs produce one still frame, and files must be no larger than 30 MB.
Large sources are reduced proportionally to 4000 pixels on the longest side and approximately 8 megapixels overall before sharpening. The page shows the working dimensions and any resize notice. Sharpening does not increase that resolution or undo the reduction. Keep the full-size source for archival or large-print work rather than treating a stronger setting as extra resolution.
Sharpening versus sketching and straightening
The image to sketch converter replaces normal photographic shading with a grayscale pencil-style blend. Sharpening instead keeps the photograph's overall appearance and strengthens nearby differences. Choose it when you need a little more edge definition; choose sketching when you intentionally want an illustrated treatment.
If the picture is tilted, use the rotate image tool before a final sharpening pass. Download the corrected copy and open it here, since tools do not share an unsaved workspace. Rotation addresses geometry; sharpening cannot make a slanted horizon level or turn a photographed page into a properly squared scan.
Sharpen a photo on a phone
Tap Choose image in a modern mobile browser and select a supported picture. Move Sharpen amount, wait for the preview and download the chosen version. Open the saved copy at a useful viewing size before sharing it, because a small mobile preview may conceal halos.
Convert HEIC files before opening them. If paste fails, choose the file directly; a copied link is not image data, and clipboard support varies. Large decoded photos need much more memory than their compressed size suggests. Close busy tabs or use a smaller source if the browser becomes unresponsive, then confirm that its remaining resolution meets your needs.
Local processing and keeping an untouched source
The image is sharpened on your device inside the browser, without an upload to a processing server. The website still loads its own page assets. Download creates a separate file and leaves your original untouched. Save before refreshing or closing the page, since the working image is temporary memory rather than a cloud project. Retain the source for future adjustments. An exported sharpened picture does not include an undo history or the unclipped original channel values.
Frequently asked questions
How do I sharpen an image without overdoing it?
Choose a supported picture and begin with a low Sharpen amount. Compare a fine edge and a smooth area as you increase it. Stop when halos or grain become noticeable. Download and inspect the saved result at its intended viewing size.
Can I sharpen a photo on my phone?
Yes, use Choose image in a modern mobile browser. Export HEIC photographs as PNG or JPEG if necessary. Adjust the amount, download and look in Downloads or Files for the result. Inspect the saved copy beyond the small preview before sharing.
Does sharpening improve quality or add resolution?
It can make existing edges look clearer, but it does not add pixels or recover missing detail. Large inputs are resized to the working limits first. Excessive amounts may make the result worse by emphasizing noise and compression artifacts. PNG avoids another lossy save step.
Can I sharpen my picture without uploading it?
Yes, the operation runs locally on your device in the browser. No selected image is sent to a processing server or remote model. Download before refreshing or navigating away, because the workspace does not provide a cloud backup.
Is sharpening the same as removing noise?
No, sharpening increases local differences while denoising aims to suppress unwanted variation. Sharpening can make noise more visible, particularly in shadows. This page has no denoising control. Reduce problematic noise elsewhere before judging a modest sharpening pass.
Can I undo sharpening after changing the slider?
Set Sharpen amount to zero while the original remains open to return to its working pixels. Each adjustment is recalculated from that source. Reset restores the default amount of one, not zero. Keep the original because a saved sharpened file has no reversible editing history.
Why does my blurry photo gain outlines instead of detail?
The tool increases contrast at edges that already exist. Severe blur may have removed the fine information you want to see, leaving only broad transitions to emphasize. More sharpening can outline those transitions without restoring the subject. Use a clearer source when possible.