Blackify Image Online
Deepen the shadows or take every visible pixel all the way to black.
Image workspace
No upload. No watermark.A new perspective starts here.
Drop your image, or paste it anywhere.
PNG, JPG, WebP & more · Up to 30 MBYour image stays on your device.
Ctrl + V to pasteHow to use the blackify image tool
- Open the source. Choose PNG, JPEG, WebP, GIF, AVIF or BMP from your device. You can also drag a file or paste copied image data with Ctrl+V on Windows or Command+V on Mac.
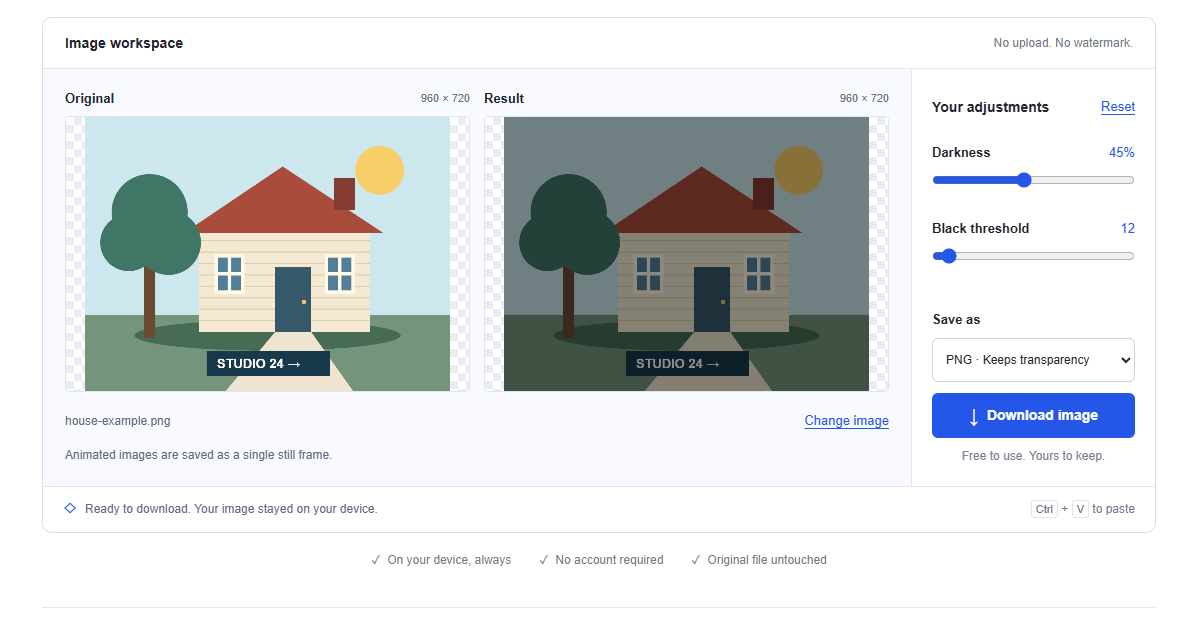
- Adjust darkness first. Start with a modest Darkness amount and a low Black threshold. Compare the subject's outline, then increase the threshold only if you want more remaining channel values to become zero.
- Check the final setting. Full darkness makes every visible pixel black, so use it only when that is intended. Choose PNG or JPEG and download after checking the displayed dimensions.
What darkening and the threshold do to pixels
Darkness multiplies each red, green and blue channel by one minus the selected amount. The Black threshold then sets any remaining channel value below its level to zero. For example, a channel at 120 becomes 60 with 50% darkness; a threshold of 80 then clips that 60 to zero. Thresholding happens separately for each channel, not once for the brightness of the whole pixel.
That separate clipping can shift colors as well as remove shadow detail. Alpha stays unchanged. At full darkness, all visible pixels become black, but existing transparent areas remain transparent when exported as PNG.
Five uses for a darker picture
Fit product imagery into a dark landing page
A bright product photograph can overpower a dark page even when its placement is correct. Try modest darkening and compare it inside the actual layout, especially around edges where the image meets the page background. The product is darkened along with its surroundings, so protect recognizable details by keeping the threshold low. For accurate product colors or a separately controlled background, use an editor with masks instead.
Prepare a mockup for a black background
A transparent cutout can be darkened before placement in a mockup without adding a rectangular backdrop. Download PNG and check semi-transparent edges against the intended black background. Blackify does not replace a white photographic background with transparency, nor does it detect the product. If the original is opaque, prepare the cutout elsewhere first; otherwise the entire rectangle is affected along with the subject inside it.
Develop a dark poster or cover image
For an atmospheric cover, reducing brightness can leave more visual room for a title and a small amount of supporting text. Place the downloaded image in your design and judge the lettering at the intended size. Too much threshold can turn important forms into indistinguishable black areas. Test both the screen version and a print proof, since details that look visible on a bright display may disappear in print.
Make a busy background less prominent
A background picture behind a separate heading or product cutout may need to become quieter. Darken that background asset here, then layer the foreground elements over it in your layout editor. The tool applies the adjustment to every pixel, so it cannot keep a subject inside the same photograph brighter. If subject and background are already flattened together, selective masking is the appropriate way to separate their treatment.
Prepare imagery behind slide text
A lightly darkened image can leave more room for pale slide lettering while preserving enough context to support the talk. Check the actual slide from a distance rather than judging only the small preview. Keep important information in real text layers instead of burying it in the photograph. Darkening alone does not guarantee readable contrast, particularly where bright highlights remain behind the words or the projector changes apparent brightness.
PNG, JPEG and black backgrounds
Use PNG when working with a transparent cutout or silhouette. It preserves the existing alpha channel and saves the processed pixels without lossy compression. A transparent source can become an isolated black shape; an opaque photograph at full darkness becomes a black rectangle because no background removal takes place.
JPEG is useful for an opaque photographic background, but it fills transparent regions with white rather than black. Choose PNG when the image must sit cleanly on a dark page. JPEG compression can affect subtle shadow transitions, so review the saved copy. Canvas export also omits the original camera EXIF metadata.
Supported files and working resolution
Open PNG, JPEG, WebP, GIF, AVIF or BMP when your browser can decode the file. HEIC and SVG are not accepted, so convert them to PNG or JPEG first. Animated files become a single still frame. The input file must be no larger than 30 MB.
Large sources are resized proportionally to a longest side of 4000 pixels and approximately 8 megapixels overall. The page shows a resize notice and the working dimensions. That reduction can remove texture before darkening begins, and thresholding may remove more visible shadow detail. Keep the full-resolution source if you later need a lighter version or a larger print.
Blackify versus a brightness adjustment
A basic brightness adjustment changes channel levels without necessarily forcing low values to zero. Blackify combines a multiplicative darkening step with an optional hard threshold. With Black threshold at zero, it performs only that multiplication; raising the threshold deliberately clips darker channel values, which can create stronger black areas and alter their color balance.
Use the grayscale converter when your goal is removing color rather than reducing brightness. Use the negative image generator to reverse light and dark relationships and colors. Neither is equivalent to darkening. A white object becomes darker here, while a negative treats all its colors as values to reverse.
Darken an image on your phone
Tap Choose image in a modern mobile browser and select a supported file from Photos or Files. Adjust Darkness and Black threshold, then save the chosen version. Review the downloaded result on the background where it will be used; your screen brightness can make subtle shadow detail difficult to judge.
If the file is HEIC, export a compatible copy before opening it. If paste fails, use the picker because a link is not image data and some mobile clipboards restrict image access. Large decoded photographs may exhaust memory. Close other busy tabs or use a smaller copy if the page becomes unresponsive during processing.
Private processing without a saved cloud project
The selected image stays on your device and is darkened in the browser. It is not uploaded to an editing server, and the original file is not overwritten. The website itself still requests its code and example assets normally. Download before refreshing, closing the tab or changing tools. Those actions discard the temporary image and settings. Keep the original, because a saved image with clipped black areas cannot recover the tones that were removed.
Frequently asked questions
How do I blackify an image without losing every detail?
Choose your picture and begin with modest Darkness and a low Black threshold. Compare the important contours before increasing either control. Thresholding removes darker channel values, so lower it if shadows become featureless. Download a separate copy when the result suits your layout.
Can I darken a photo on my phone?
Yes, open this tool in a mobile browser and tap Choose image. Convert HEIC files to PNG or JPEG if necessary. Adjust both sliders and download the result. Check the Downloads list or Files app if it is not in your photo library.
Does blackifying reduce image quality?
It intentionally reduces channel values and can permanently clip shadow information in the saved result. Large inputs may also be resized before processing. PNG avoids additional lossy compression, while JPEG can add it. Preserve the original if texture and later adjustments matter.
Can I darken an image without uploading it?
Yes, processing happens locally in your browser. No selected image goes to an editing server, and no account is required. Download before refreshing or leaving the page because the temporary workspace does not have a cloud backup.
How is blackify different from reducing brightness?
Blackify first multiplies color channels by a darkening factor. It can then set channel values below Black threshold to zero. A simple brightness adjustment need not include that second step. Set the threshold to zero if you want darkening without deliberate threshold clipping.
Can I undo the darkening or restore the original?
While your original is open, set both Darkness and Black threshold to zero for its working appearance. Reset restores the default darkening settings instead. A saved result cannot reliably recover clipped shadows, so keep the original file for future edits.
Can I make a silhouette or darken only the background?
A transparent cutout becomes a black silhouette at full darkness when saved as PNG. An opaque photo instead becomes a black rectangle. There is no subject detection, brush or background selection here. Prepare separate layers elsewhere if only one area should change.