Create a Negative Image
Reverse your photo’s colors, then soften the tones to make it your own.
Image workspace
No upload. No watermark.A new perspective starts here.
Drop your image, or paste it anywhere.
PNG, JPG, WebP & more · Up to 30 MBYour image stays on your device.
Ctrl + V to pasteHow to make a negative image
- Open your source. Choose a PNG, JPEG, WebP, GIF, AVIF or BMP file. On a computer, dragging a file or pasting image data with Ctrl+V on Windows or Command+V on Mac works too.
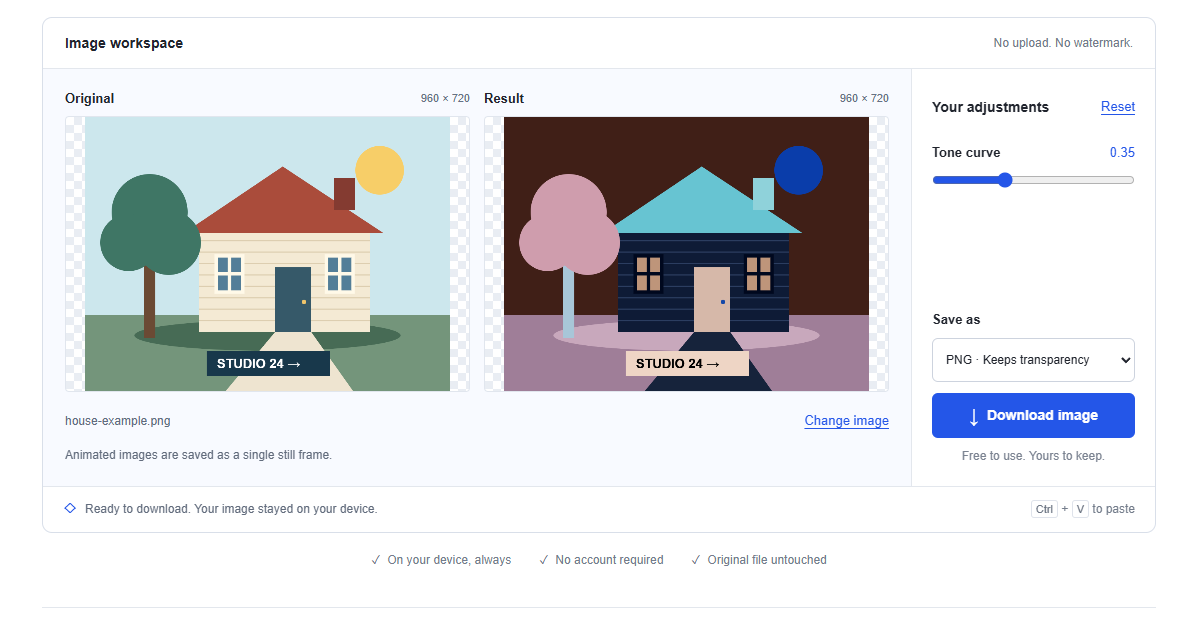
- Set the tone curve. The preview reverses colors automatically, with a default curve of 0.35. Move Tone curve toward zero for an exact inversion or raise it to brighten intermediate inverted values.
- Compare and save. Check both pale and dark areas, including any important colored labels. Choose PNG or JPEG, confirm the result dimensions and press Download image to create a separate copy.
How the negative effect changes pixels
Each red, green and blue channel is first reversed by subtracting its value from 255. The result is divided by 255 to give a value v between zero and one. The curve adds curve × v × (1 − v) × 0.9 before converting back to an integer channel value. This raises intermediate tones without moving the black and white endpoints.
At zero curve, the process is direct RGB inversion. Higher values alter the tonal relationship after that reversal; they do not simulate a specific film stock. Pixel positions and the alpha channel remain unchanged, so a transparent cutout keeps its outline.
Five reasons to try a photo negative
Preview a darkroom-style tonal reversal
When planning a photographic project, a digital negative can help you see which bright shapes will become dark and how a familiar scene reads with reversed tones. Compare a straight inversion with a lifted curve to explore the mood. Treat this as a visual sketch for the project, not a prediction of paper exposure, chemical development or a particular film response in an actual darkroom.
Inspect an old film scan as a positive
If your scanner saved the negative without converting it, reversing it can make faces and objects easier to identify. Start with the curve at zero, then compare a modest lift. Color film often has an orange mask that needs separate correction, and this tool does not calibrate scanner color or repair fading. Keep the untouched scan as your archive and use the result as an inspection copy.
Check film and plate artwork polarity
A printing workflow may call for light areas to become dark before a film or plate is prepared. A zero-curve negative provides a quick way to inspect that polarity on an existing raster design. Confirm the print provider's requirements before output, including resolution, whether positive or negative film is needed, and any mirroring. This tool does not create halftones, color separations or a press-ready plate file.
Explore a reversed product image for a dark layout
A product photographed on white may create a striking dark-background concept when inverted. This is useful for an experimental campaign where unusual colors are intentional. It also changes the product itself, including its brand colors, so it is unsuitable when accurate appearance matters. If you only need to darken a normal product photo for a landing page, use the linked darkening tool instead of reversing its colors.
Teach RGB complements and tonal mapping
Use a simple picture containing red, green, blue, black and white to demonstrate what channel inversion means. Students can predict the result before comparing the two previews. Then raise the tone curve and ask which regions change most: intermediate values move while the endpoints stay fixed. This makes a useful classroom example of how a mathematical pixel operation differs from moving objects or changing image dimensions.
PNG or JPEG for a negative?
Use PNG for color experiments, film inspection copies, diagrams or any transparent artwork. It preserves the rendered pixels without lossy compression, making small differences easier to compare. The effect keeps alpha, so transparent parts remain transparent rather than becoming black or white.
JPEG suits a photographic copy for a layout that needs no transparency. Its export places transparent regions on white and compresses fine detail; repeated saves can add artifacts. Neither format preserves the original camera EXIF metadata through this canvas export. Keep the source scan or photograph separately for archival work and later correction.
File formats and image size limits
Open PNG, JPEG, WebP, GIF, AVIF or BMP, subject to the browser's decoding support. HEIC and SVG need conversion to PNG or JPEG first. A TIFF scan must also be exported to a supported format. Animated inputs produce a single still frame, and the file-size ceiling is 30 MB.
Before processing, the source is reduced proportionally if it exceeds 4000 pixels on its longest side or approximately 8 megapixels. This can reduce grain and small film detail, even though the negative operation does not itself change the working dimensions. Read the displayed size and resize notice before deciding whether a scan is suitable for printing.
Negative image versus color inversion
In everyday language, negative and inverted images often mean the same thing. Here the difference is an adjustable tone curve after inversion. The invert image colors tool performs only the RGB reversal, while this page can also lift the reversed midtones. Set Tone curve to zero and the two operations match at the same working size.
To reduce lightness without reversing the palette, use the blackify image tool. To remove color while keeping ordinary light and dark relationships, use the grayscale converter. Those changes solve different layout problems; a negative is not an automatic exposure correction or a substitute for scanner color management.
Make a negative on a phone
Tap Choose image in a modern mobile browser, select a picture and wait for the comparison. Adjust Tone curve with the slider, then download the format you need. The saved file may be in your browser Downloads list or Files app rather than appearing immediately in the photo library.
If an iPhone file is HEIC, export a supported copy first. A pasted website address is not image data, and mobile clipboard access varies; selecting the file is the simpler fallback. For an unresponsive tab, reduce the source dimensions and close other busy tabs. A compressed scan can still use substantial memory once decoded into pixels.
Private processing and temporary previews
The negative is calculated from pixels in your browser, without uploading your image to an editing service. The website loads its own code and example artwork normally, but your selected photograph stays on your device. No account or watermark is required. Download before refreshing, closing the tab or opening another tool. Those actions discard the temporary workspace; there is no cloud history from which to retrieve it. Saving a result creates a new file and leaves the original available for a fresh conversion.
Frequently asked questions
How do I make a negative image online?
Choose, drop or paste a supported picture into the workspace. The effect appears automatically with a modest tone curve. Adjust that curve while comparing the original and result, then download PNG or JPEG. You do not need an account.
How can I make a photo negative on my phone?
Open the page in your browser and tap Choose image. Convert HEIC pictures to PNG or JPEG if they are rejected. Adjust the curve, download, and check your browser downloads or Files app. Keep the page open until saving has started.
Does making a negative reduce image quality?
The color operation keeps the working resolution, but large inputs are resized first. The tone curve and integer rounding change pixel values intentionally. PNG avoids additional lossy compression, while JPEG may add it. Keep the original for exact source colors and full resolution.
Can I create a negative without uploading my picture?
Yes, processing happens in your browser on your device. No selected image is sent to a conversion server. Download the finished version before refreshing, since the local workspace is temporary rather than cloud storage.
Is a negative the same as inverted colors?
With Tone curve set to zero, this tool performs the same direct RGB reversal as the inverter. Raising the curve brightens intermediate inverted values. It changes the look of the negative without rotating or mirroring the picture.
Can I reverse the effect and recover the original?
An exact inversion applied twice can restore channel values if no other changes intervene. A nonzero tone curve, resizing or JPEG compression prevents relying on that round trip. Reset restores the default curve, not the original colors. Keep your source file for a reliable original.
Why does my converted film scan still have strange colors?
Color negative film may have an orange mask, and the scan may contain exposure or color-balance shifts. This tool reverses channel values but does not remove that mask or calibrate the scanner. Use dedicated film correction for accurate colors and retain the untouched scan.