Image to Sketch Converter
Turn a photograph into a pencil-style sketch with adjustable lines and shading.
Image workspace
No upload. No watermark.A new perspective starts here.
Drop your image, or paste it anywhere.
PNG, JPG, WebP & more · Up to 30 MBYour image stays on your device.
Ctrl + V to pasteHow to convert an image to sketch
- Choose a clear photograph. Open PNG, JPEG, WebP, GIF, AVIF or BMP with Choose image. You can also drag a file or paste image data using Ctrl+V on Windows or Command+V on Mac.
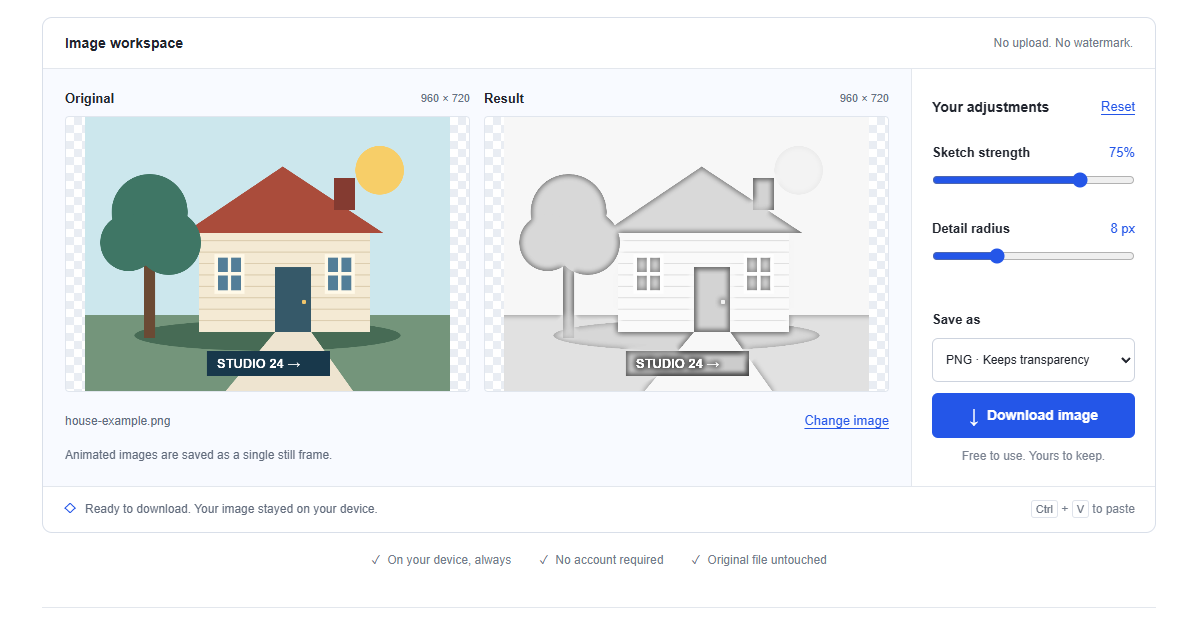
- Adjust the pencil effect. Sketch strength blends from the grayscale source toward the sketch. Detail radius changes the neighborhood used for shading; compare small features such as eyes or window frames as you adjust it.
- Check the output. Choose PNG or JPEG and read the displayed dimensions before downloading. View the saved image at the size you intend to print or place in your document.
How pixels become pencil-style shading
The converter first calculates grayscale brightness from the RGB channels. It makes an inverted copy, blurs that copy and combines it with the grayscale source using a color-dodge blend. Nearby tonal differences become prominent while many smooth areas become pale, creating the impression of pencil marks on paper. Sketch strength controls how much of that blend replaces the grayscale base.
This is a local raster effect, not a drawing model. Detail radius changes the scale of the blurred neighborhood, rather than setting a literal pen width. The result remains pixels with the original alpha channel; it does not generate editable vector paths.
Six practical uses for a photo sketch
Prepare a reference for a tattoo artist
A sketch version can help you discuss the shape, pose and main shadows of a reference photograph. Choose an image with a simple background so the important contours remain easy to see. Bring both the photograph and converted sketch to the artist, who can decide what translates into a tattoo. This effect does not create a finished stencil or account for how thin lines age on skin.
Plan a portrait, pet or house gift
A favorite pet photograph or a picture of a first home can become the starting point for a personal card or framed print. Compare the face, fur outline or roofline at the intended display size, because fine textures can become busy marks. Try more than one source photo if important details disappear. Keep a clean margin when arranging the downloaded sketch in your print layout.
Make a starting point for a coloring page
A clear photograph of a simple object can produce an outline-like reference for a coloring activity. Increase sketch strength and inspect whether the large areas are pale enough to color. The result can still contain gray shading and small disconnected marks, so it may need cleanup in another editor. For young children, choose broad recognizable shapes rather than a complex scene with foliage or many tiny objects.
Add a drawing treatment to invitations and stationery
A venue, flower arrangement or meaningful object can look more consistent with a quiet stationery design after conversion. Place the sketch in a draft invitation and check that it supports the event details without competing with them. Pale lines may disappear on textured or cream paper, so print a small proof. The effect does not remove the original background; begin with a cutout if transparency is needed.
Use reference pictures in presentations and design documents
Sometimes a full-color photograph dominates a slide when the point is an object's shape or arrangement. A pencil treatment can reduce that distraction while retaining recognizable structure. Test the sketch at the actual slide size, and keep annotations outside busy shaded areas. For technical documents, retain the original wherever exact materials, surface colors or evidence matter; a stylized rendering is an illustration rather than a faithful record.
Study proportions while learning to draw
Place the converted image beside the original to compare large shapes, light areas and clusters of dark marks. It can give you a starting reference for tracing or planning a drawing, especially when color distracts from value. The algorithm does not understand anatomy or artistic line weight, so do not treat every mark as a line you must copy. Simplify the result according to your drawing exercise.
Save a sketch as PNG or JPEG
PNG is useful for thin marks, lettering and transparent artwork because it avoids another lossy compression step. It preserves existing transparency, but white or pale areas created by the sketch effect are still opaque if the source was opaque. A white-looking page is not automatically a transparent background.
JPEG can suit a photographic sketch placed on white when file size matters. Its compression may add faint speckles around fine lines, and transparent pixels become white. Inspect the saved version before printing. Neither export retains the source camera EXIF metadata, and neither can restore detail already lost during resizing.
Supported formats and print-size limits
The input accepts PNG, JPEG, WebP, GIF, AVIF and BMP that your browser can decode. HEIC and SVG are not accepted, so export a supported raster copy first. Animated pictures produce one still frame. The maximum file size is 30 MB.
Large sources are resized proportionally to a longest side of 4000 pixels and approximately 8 megapixels overall. The workspace shows the resulting dimensions and a notice when resizing occurs. Thin lines may become less distinct after reduction, and this converter does not add resolution for a larger print. Judge the output at its intended physical size before ordering copies.
Sketch, line art and outline: what is the difference?
A sketch contains tonal shading and varied marks that suggest pencil work. Line art usually relies on clean deliberate lines with little shading, while an outline describes a subject's outer contour. This converter produces the first style; it does not trace a single contour, guarantee closed coloring regions or export SVG paths.
Use the grayscale converter when you want the photograph's normal shading without the pencil blend. The sharpen image tool emphasizes existing edges while retaining the photographic appearance. Neither is a vector tracing tool. For a clean stencil or cutting path, use dedicated drawing or tracing software after preparing your reference.
Create a sketch in a mobile browser
Tap Choose image, select a supported photo and wait for the result before moving the sliders. Start with a simple subject so you can judge the effect on a small screen. Download the chosen version and check the browser downloads list or Files app if it is not immediately visible in Photos.
Convert HEIC phone pictures first. If paste fails, choose the file directly; a copied URL is not image data. Sketch processing needs several temporary pixel buffers, so a large picture may exhaust mobile memory. Close other busy tabs or use a smaller source if the page stalls, then check whether the remaining detail is sufficient.
Local conversion without an image upload
The sketch is calculated in your browser; no selected photograph is sent to an editing server or remote drawing model. The page still downloads its own code and examples. Your original stays untouched, and the result has no added watermark. Download before refreshing or leaving the tool, because the source and slider settings live in temporary memory. This is not cloud storage or a saved project. Reopen the original whenever you need a fresh version.
Frequently asked questions
How do I turn a photograph into a pencil sketch?
Choose a supported picture and wait for the automatic preview. Adjust Sketch strength and Detail radius while watching important contours. Download once the balance of lines and shading suits the use. A clear source with a simple background is easier to work with.
Can I make a sketch on my phone?
Yes, use Choose image in a modern mobile browser. Export HEIC photographs as PNG or JPEG before opening them. If processing stalls, try a smaller photo because sketching uses temporary pixel buffers. Save the result before closing the tab.
Will the conversion reduce my image quality?
The pencil effect intentionally replaces photographic detail with different tonal values. Large pictures are also reduced to the working limits before conversion. PNG avoids extra lossy compression, while JPEG can soften fine marks. Keep the original photograph for an unchanged reference.
Can I convert my photo without uploading it?
Yes, all pixel processing happens locally in the browser. No image is sent to a remote AI service or editing server. The preview is temporary, so download your sketch before refreshing the page or switching to another tool.
Is this the same as a grayscale or outline converter?
No, grayscale retains the normal shading of the photograph without the pencil blend. This effect emphasizes local tonal differences and pale regions. It may resemble line art on some sources, but it does not produce a clean vector outline or closed paths.
Can I undo the sketch and recover the colors?
Your original file remains unchanged and is the reliable source for its colors. Setting Sketch strength to zero shows grayscale, not the full-color original. Reset restores the default sketch settings. A downloaded sketch does not contain hidden original color information.
Why are some lines too faint to print?
Low-contrast source areas can become very pale in the color-dodge blend. Try a larger Detail radius or lower Sketch strength to recover more grayscale shading. Compare the result at print size and make a proof. Another source photograph may give clearer contours.